An Architect’s Blueprint for His Hillside Home
Plans include an open kitchen, new closets, oak floors, and embracing the “cons” of Carrara marble
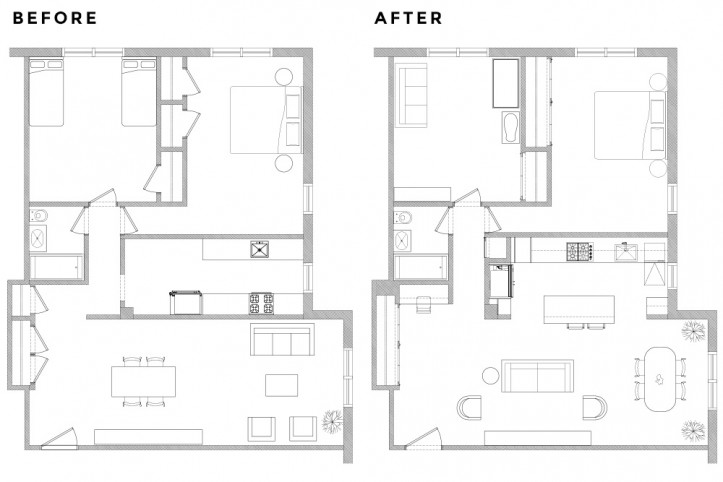
A search for a home to suit their growing family led Marissa and Cody from the West Village to a beautiful spot in northern Manhattan. The apartment, a two-bed, one-bath corner unit, was located on a steep hill in the neighborhood of Hudson Heights. (Fun fact: the building’s foundation sits on a lattice of 40-foot steel stilts!) It came with soaring views of the city, gorgeous light from its north- and east-facing windows, and felt “more like San Francisco than New York City.” The unit’s interior needed some updating, and Cody, an architect, was up to the task. Paired up with a contractor from Sweeten, a free service matching renovating homeowners with vetted general contractors, they knocked down a wall closing in the galley kitchen to connect it to the living room—creating an open kitchen design—removed a nib wall, and made changes to the bath as well as the floors and closets throughout. Read on for how the couple created a warm but modern home for themselves, their daughter Lucia, and a new baby on the way.

Guest post by Hudson Heights homeowners Marissa and Cody


Cody says: We had been renting a one-bedroom apartment in the West Village for seven years. We started looking to buy an apartment when Marissa became pregnant, and homed in on northern Manhattan to give her a reasonable commute to Columbia University (we had ruled out several neighborhoods in Brooklyn for this reason). Our first impression of Hudson Heights was that it felt like a small village tucked away in the city, surrounded by amazing views and parks. We visited on a snowy winter day, and saw a cross-country skier in the middle of the street!
We continued to look more seriously after our daughter, Lucia, was born, and finally closed on an apartment in March 2016: a two-bed, one-bath, 1,000-square-foot apartment in a 1960s co-op building. Though the postwar construction did not have some of the Art Deco, prewar detailing that is typical of the neighborhood, it did lend itself to a simple and logical floor plan and had thru-wall air conditioning units—allowing in even more light than apartments we saw with window units.


Marissa says: Cody is an architect, and we wanted something we could renovate and make our own. While continuing to live in our West Village apartment, we posted our project to Sweeten and went with a Sweeten contractor who was professional, communicative, and direct. The renovation took eight weeks (two weeks under the projected schedule the contractor proposed!), and we moved in just after he finished.
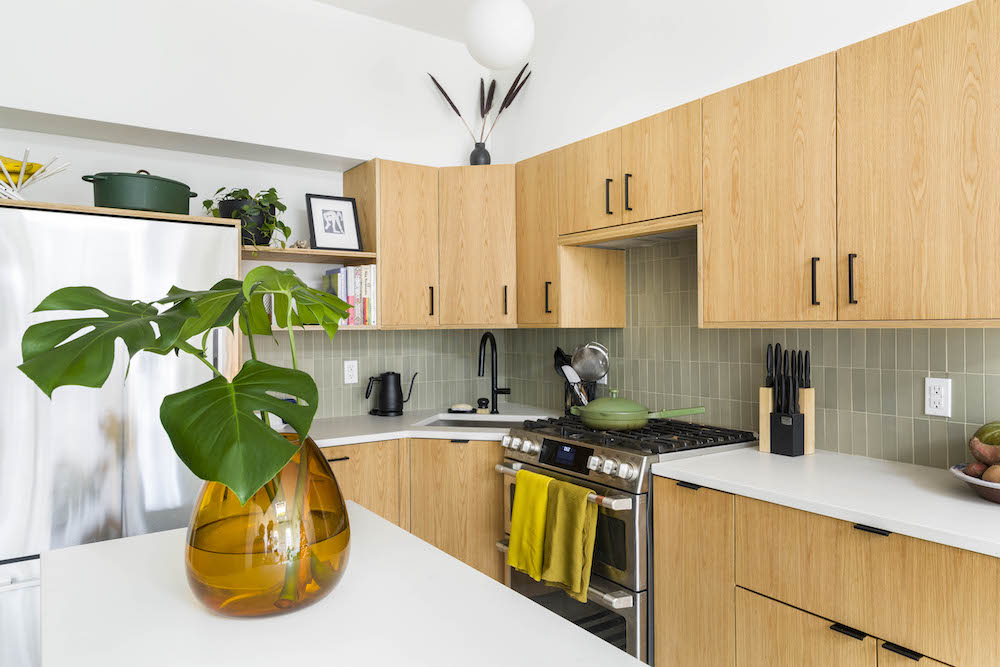
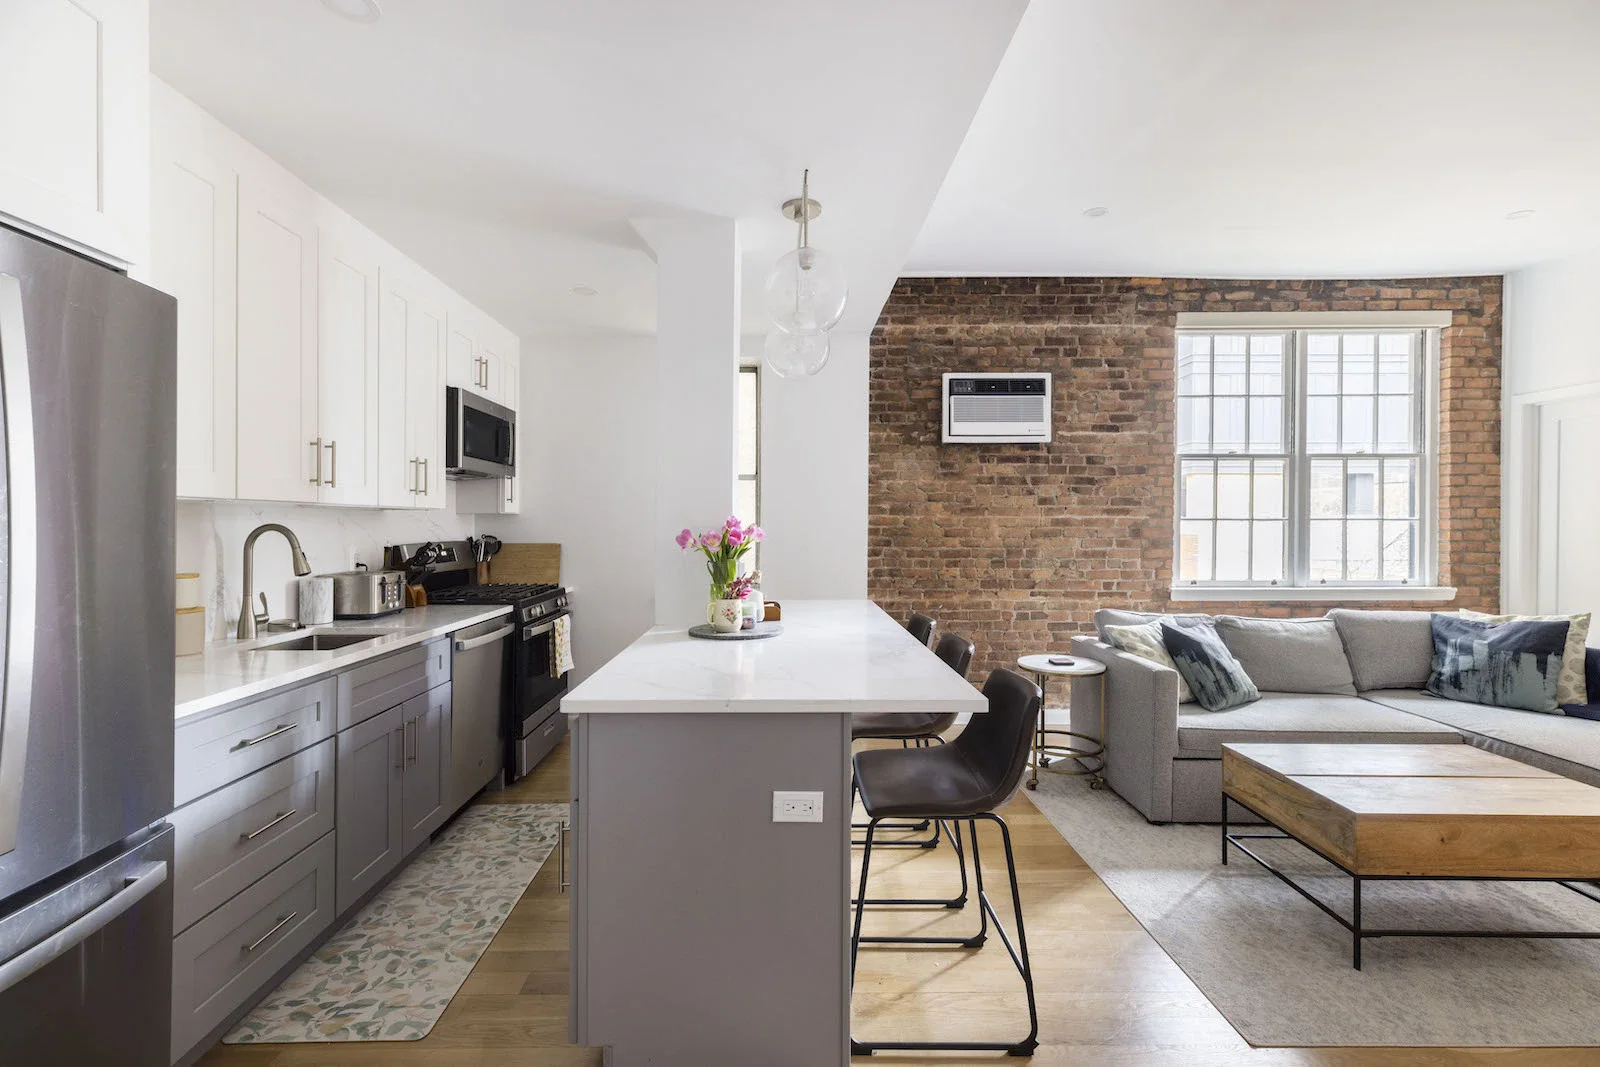
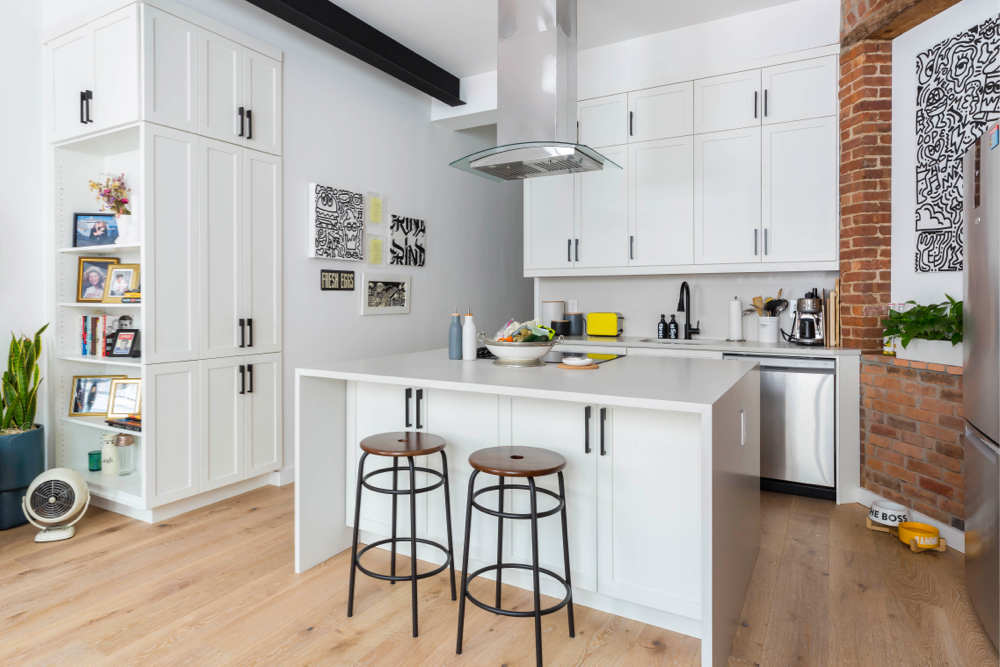
In terms of our overall vision, first and foremost we wanted to join the kitchen to the living space. We hoped to make the apartment feel open, light, and modern, but warm and homey at the same time. We were drawn to a clean and minimal palette, especially in the kitchen. Cody is an avid home cook, and we knew the kitchen would be the heart of the home. We maximized where we could—for example, with the 36-inch wide refrigerator, five-burner range, 23-inch stainless steel undermount sink. The six-foot island is our home base, the place where we naturally gravitate throughout the day or when we have friends over.


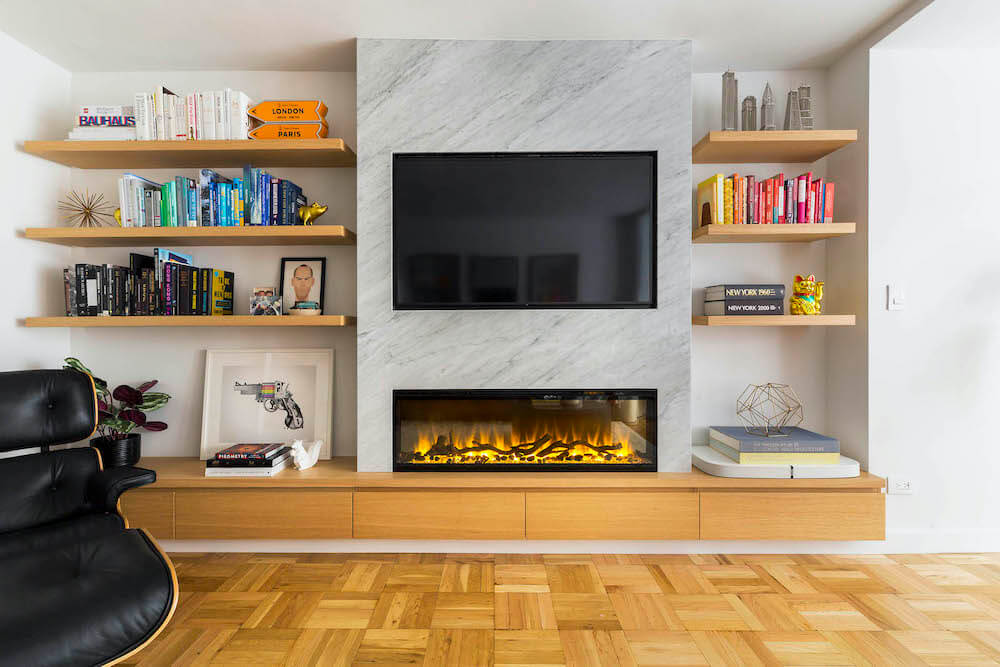
On a related note, the IKEA kitchen cabinet system is amazing for the price point. There are an infinite number of modular configurations and we achieved a result that is nearly indistinguishable from a custom kitchen. The upper cabinets are 40 inches tall and extend to the ceiling, allowing for tons of storage (we never thought we would have empty shelves while living in NYC!). It was important for us to use “real” materials like stone and wood to accent specific moments. For example, we selected the white Carrara marble knowing full well it would take a beating. We loved the idea that every scratch, etch, and stain will continue to give it character over time.

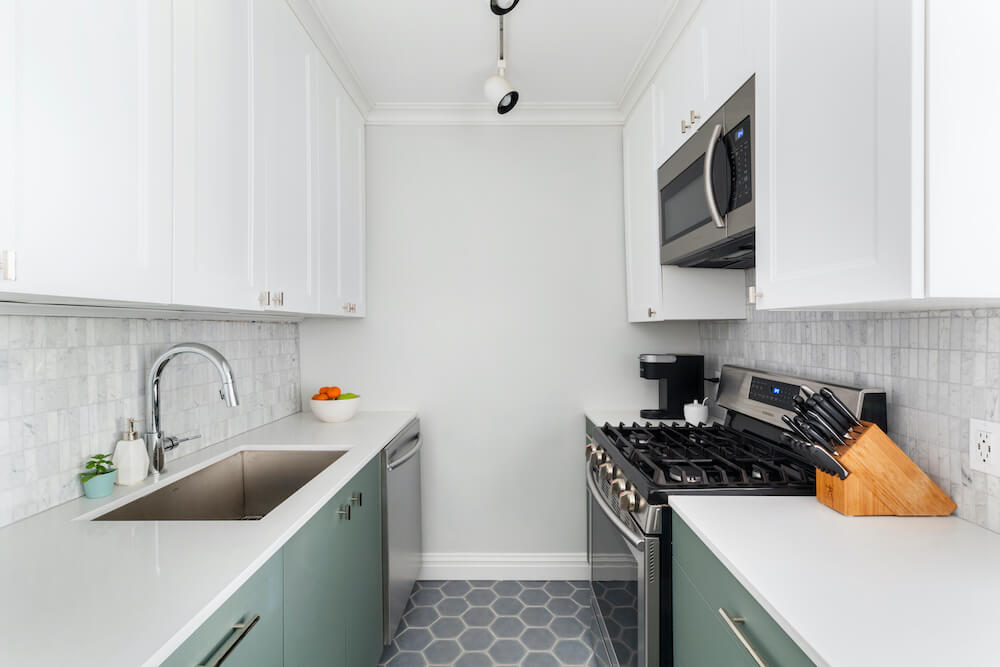
Given that an open kitchen design and living area was our primary goal, the first question we asked ourselves when viewing a potential apartment was: “Can we connect the kitchen to the living space?” The existing kitchen in our apartment was a long and narrow galley. Knocking down the wall allowed us to redesign the entire room, maximizing storage and functionality while linking the main living spaces. It also made the room much brighter—the window in the kitchen brings in tons more light to the living and dining room.
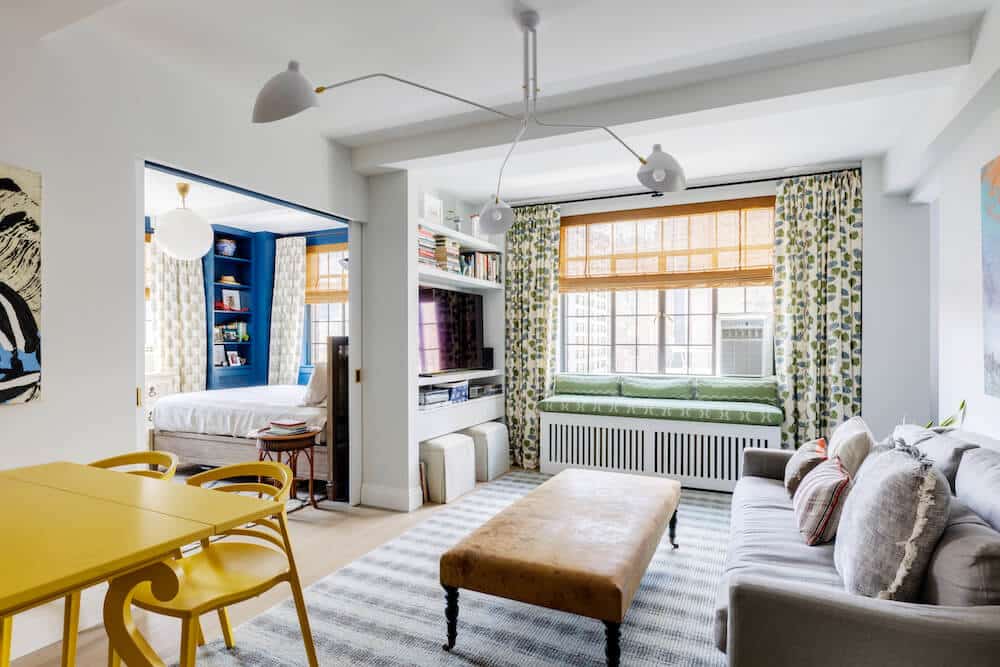
In the bedrooms, we refinished the floors with a lighter and more natural oak. We love how they seem to brighten up both spaces now. We also redid the closets in both rooms; in the master bedroom we were able to do the floor-to-ceiling pivot hinges, just like in the living space, but in Lucia’s room a beam prevented us from doing the same. We were still able to reframe her closet and maximize storage with a new shelving system. We also bought very minimal ceiling light fixtures for each room, which blend in while providing extra ambient light. All of that, plus the square-stock baseboards and door casings, really spruced up both rooms. Sweeten brings homeowners an exceptional renovation experience by personally matching trusted general contractors to your project, while offering expert guidance and support—at no cost to you. Renovate to live, Sweeten to thrive!


We also eliminated a small nib wall in the living room that separated the front living space from the bedrooms in the back of the apartment. With the nib wall gone, there is a direct line of sight to the windows in Lucia’s bedroom, which brightens the entire apartment and creates a feeling of spaciousness.


Outside of the kitchen and living room project, we also saw the opportunity to reframe the closets throughout the apartment, remove the existing sliding bypass closet doors, and replace them with floor-to-ceiling pivot hinged doors. This created ample storage, and the verticality of the doors and their accompanying hardware became a design feature consistent in every room. The reconfiguration that resulted in an open kitchen design also allowed us to create a new hallway linen closet.
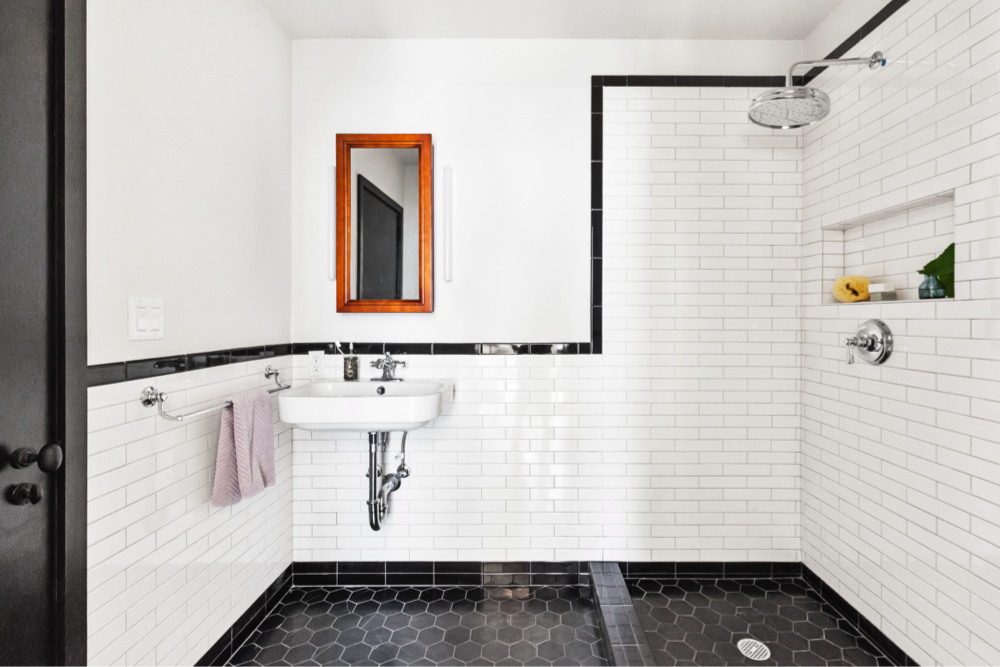
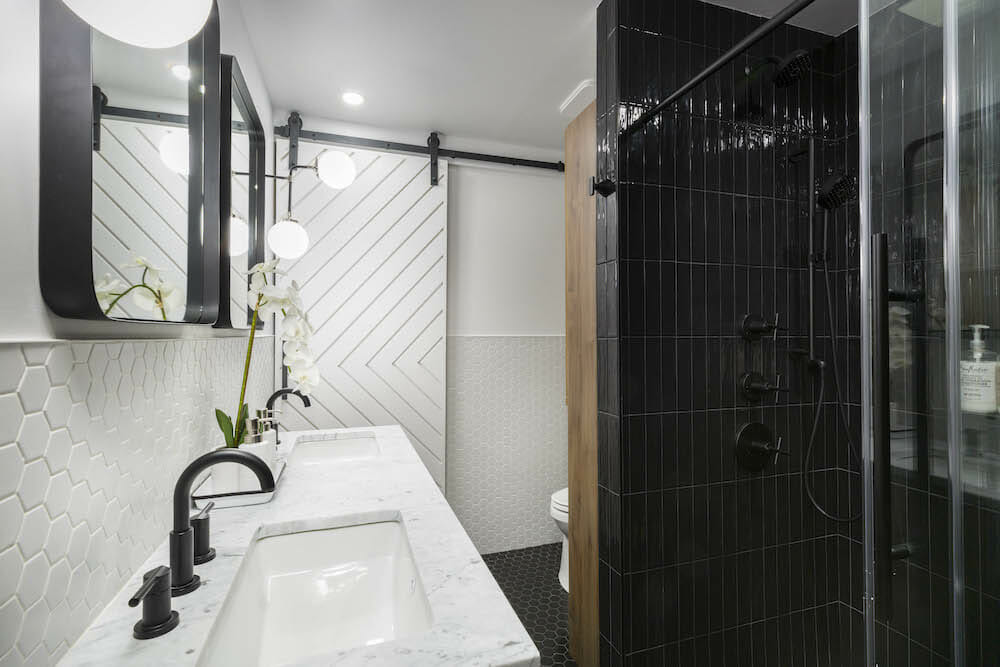
We made a few changes to the bathroom which made a big difference in the final look. We replaced the pedestal sink for a wall mounted vanity which created a lot more storage, replaced the old shower bypass glass doors with a fixed glass panel, and gave it a fresh coat of gray paint. We kept the tiles, lighting fixtures, and towel racks from the previous design.


The most surprising moment of the whole process was when our contractor sent us some photos after the first day of demolition. There was a huge pile of debris in the middle of the apartment, and a raw opening between the kitchen and living room and around each closet. Beams, columns, electrical conduit, and wiring were totally exposed. It was a shock to realize how much work we were really putting into the renovation. There was no turning back, and we could only hope that all the planning and design preparation going into the project would work out. Eight weeks later, it was a finished project and we could not have been happier.
We can’t recommend our Sweeten contractor enough. Although his bid was slightly higher than the others we received, we immediately got the sense that he would deliver a high-quality product, not exceed his budget, and stick to his schedule. All of this turned out to be accurate. We felt most comfortable with him from day one. He and Cody collaborated extensively throughout the renovation, and had a clear line of communication. He did not disappoint us in any respect.
It’s important to remember that there are many unknowns in the renovation process, and many pieces that are out of your control. Until we knocked down the wall between the living room and kitchen, we did not know for certain what would be behind it. (We had done a small probe to look for pipes, and based on the short span, we assumed that there were not any structural elements.) We couldn’t know for sure the location of the plumbing and gas risers until demolition was complete, which would ultimately dictate where we placed the kitchen sink and oven. It turned out that the gas riser was floating off the perimeter wall by almost 24 inches, and we had initially assumed it would be right along the perimeter wall. As a result, the opening to the kitchen had to be cut short. Although it was initially a disappointment, we used the 24-inch wall as an opportunity to put in a small cabinet and countertop, with wooden shelves above. It ended up being a great addition to the open kitchen design, even though we hadn’t anticipated it!

Our advice to future renovators: make your design choices ahead of time and stick to them. You don’t want to be redesigning in the middle of construction. If there are any surprises during construction (like the location of a gas riser—see above), it is critical to make a thoughtful yet quick decision and keep moving forward.
We are so happy with the apartment. It turned out just as we had envisioned it, and it’s been great to have so much space! We had been living in a 600-square-foot one-bedroom for Lucia’s first year, and by the time we moved out, we were feeling very cramped. Now, we’re expecting our second baby, and it feels like there is plenty of room to grow. But if the day comes when we do need more space and we start looking for our next renovation project, we’ll certainly use Sweeten again!
What a thoughtful and beautiful redesign, Cody! Thanks to you, Marissa, and Lucia for a glimpse into your home.
KITCHEN RESOURCES: Weathered Oak wood floor finish: Minwax. Cabinets: IKEA. Open shelving and brackets: Rejuvenation. Hopewell T-handle 2” (upper cabinets); Hopewell Bar Pull 5” (lower cabinets) cabinet hardware: Top Knobs. 1-1/4” White Carrara marble countertops with eased edge and waterfall sides: NSI Granite (supplier) A&A Marble (fabricator/installer). Matte white 2” hexagon tile backsplash: Complete Tile. Silver Shadow grout: Laticrete. Strive undermount stainless steel sink: Kohler. Matte black faucet: Brizo Solna. Side-by-Side 36” Wide Fridge: KitchenAid. Dishwasher with custom panel: KitchenAid. 5-Burner Gas Convection Slide-In Range, 30” wide: KitchenAid. Microwave drawer: Sharp. Hood: IKEA.
LIVING/DINING ROOM RESOURCES: Credenza: IKEA. Kitchen cabinet with custom white oak slab top. Living room pendants: Cedar and Moss. DIY kit dining room pendant: Lindsey Adelman.
BATH RESOURCES: Jute vanity: Kohler. White Impressions sink: Kohler. July faucet: Kohler. Clear tempered shower glass and hardware: CR Laurence. Round modern door knob with disk rosette: Emtek. Weathered Oak wood floor finish: Minwax. Decorator’s White paint: Benjamin Moore.
—
Taking down walls to create an open kitchen design allowed Natalie and Cartier to connect their living room, dining room, and kitchen for a spacious and light-filled home.
Originally Published August 31, 2017
Updated on October 07, 2023
Sweeten handpicks the best general contractors to match each project’s location, budget, and scope, helping until project completion. Follow the blog for renovation ideas and inspiration and when you’re ready to renovate, start your renovation on Sweeten.

